
Using Nvidia GPUs with Kubernetes
On-prem AI Infrastructure series
5 August 2025
This article series is dedicated to advancing research in Kubernetes and AI. Setting up GPU allocation for Kubernetes can be tricky, this article takes you through the process of creating a Kubernetes cluster that can allocate GPUs to workloads.
My setup
I am using cloudlab for the purpose of this experiment. Using primarily two types of nodes:
-
control-plane: 1 node of type c220g2 running Ubuntu:22.04
CPU Two Intel E5-2660 v3 10-core CPUs at 2.60 GHz (Haswell EP) RAM 160GB ECC Memory (10x 16 GB DDR4 2133 MHz dual rank RDIMMs) Disk One Intel DC S3500 480 GB 6G SATA SSDs Disk Two 1.2 TB 10K RPM 6G SAS SFF HDDs NIC Dual-port Intel X520 10Gb NIC (PCIe v3.0, 8 lanes) (both ports available for experiment use) NIC Onboard Intel i350 1Gb -
data-plane: 2 node of type c240g5 ( for GPU ) running Ubuntu:22.04
CPU     Two Intel Xeon Silver 4114 10-core CPUs at 2.20 GHz
RAM     192GB ECC DDR4-2666 Memory
Disk    One 1 TB 7200 RPM 6G SAS HDs
Disk    One Intel DC S3500 480 GB 6G SATA SSD
GPU     One NVIDIA 12GB PCI P100 GPU
NIC     Dual-port Mellanox 25Gb NIC (PCIe v3.0, 8 lanes)
        (both ports available for experiment use)
NIC     Onboard Intel i350 1Gb
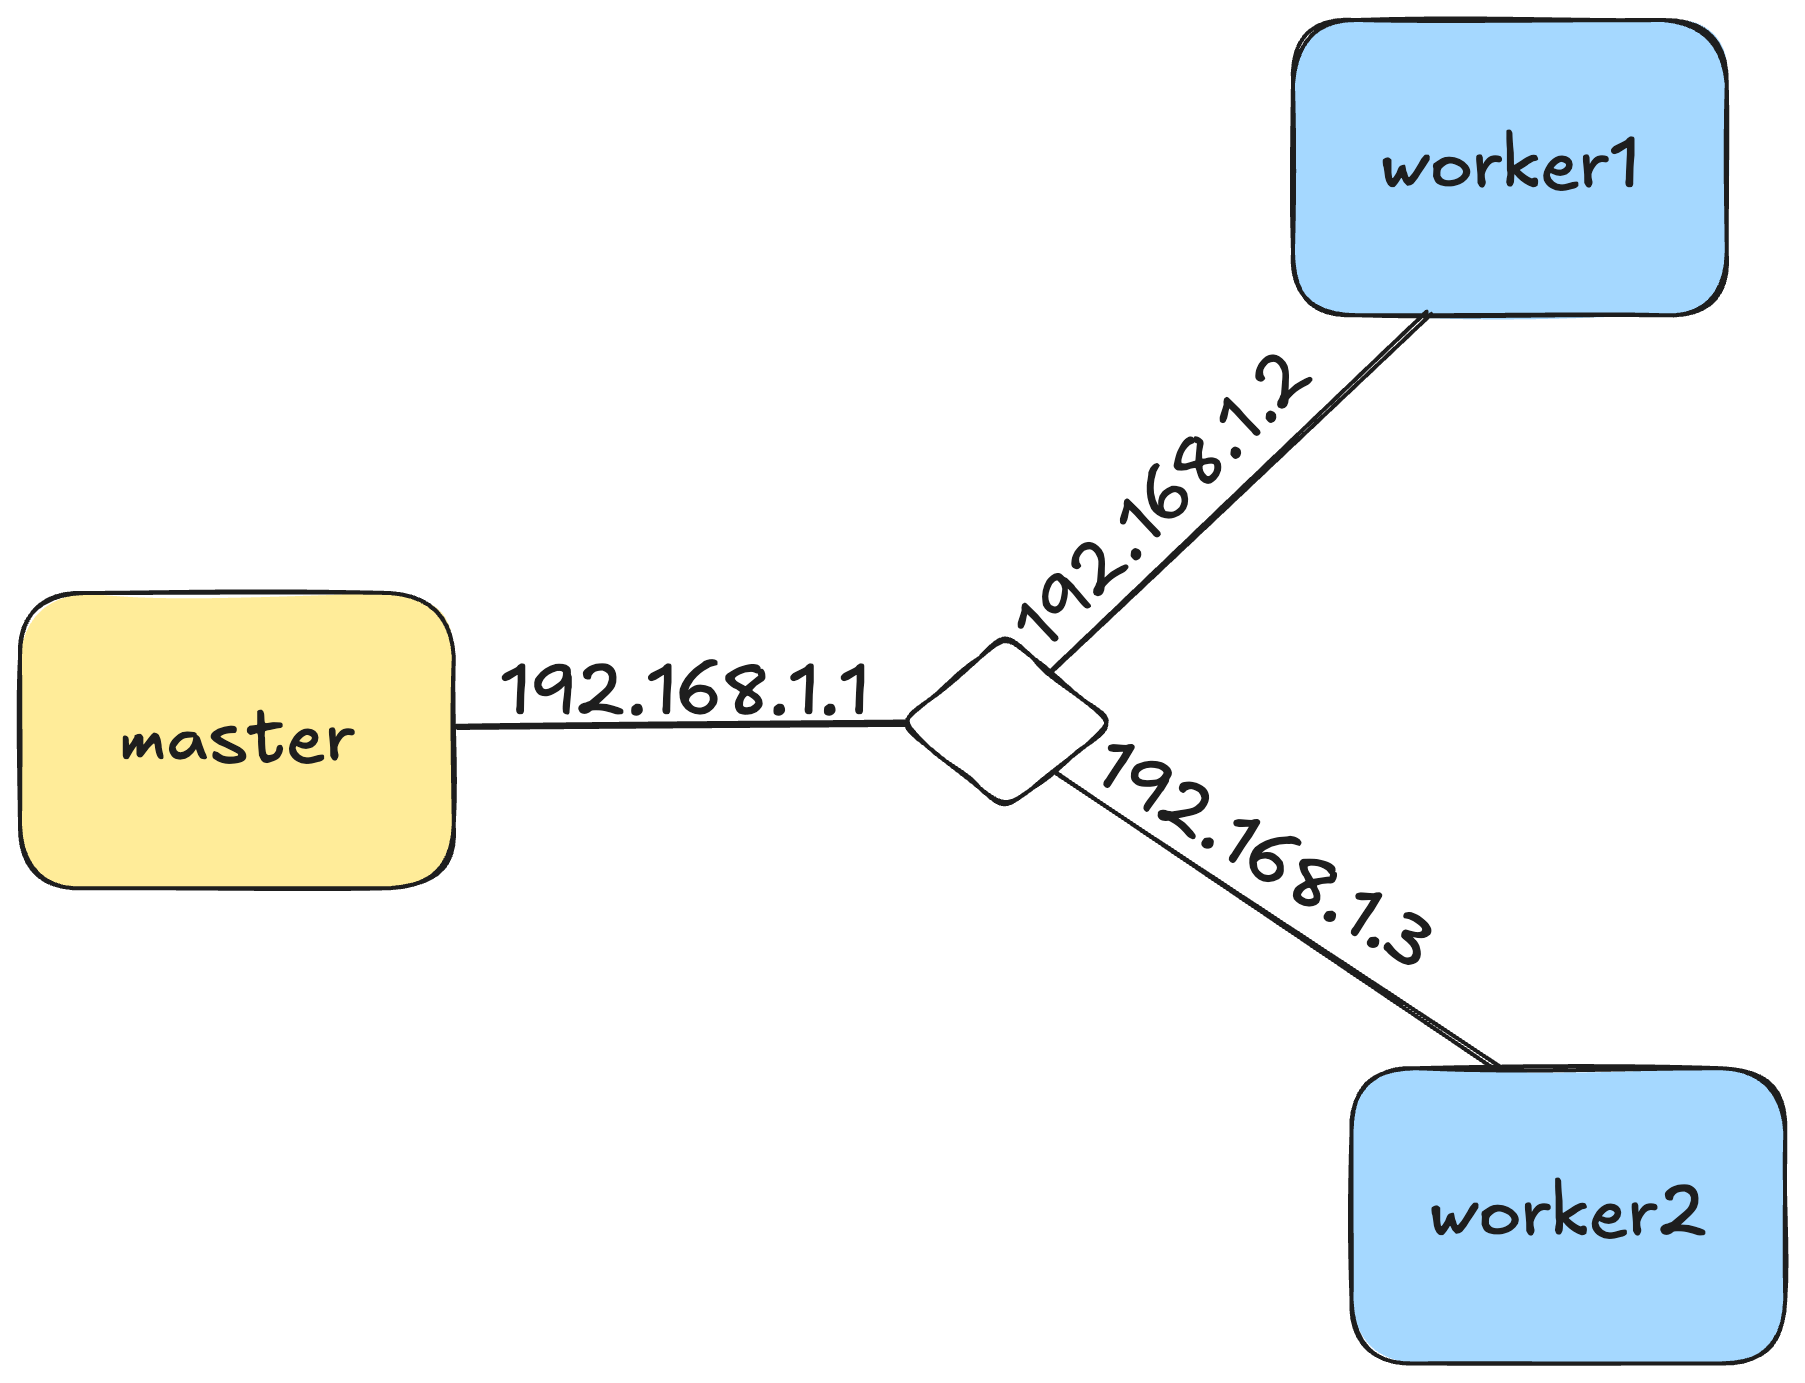
All the nodes are connected to a link and their IPs are:
master      192.168.1.1
worker1     192.168.1.2
worker2     192.168.1.3
Installing Nvidia Drivers
This is the first and most important step to be done on your GPU nodes. This helps the nvidia-container-runtime run containers with GPUs.
Using the nvidia-container-runtime is not advised for your control plane nodes, so you can skip this step for your master node.
Find the version of Nvidia drivers for your graphics card on Nvidia's website.
The driver version for my setup is nvidia-driver-575.
Now run the commands as shown below (ref: github.com/oddmario)
If you had previously installed Nvidia drivers and want to start fresh refer to step 1 on oddmario's repository.
sudo apt updatesudo apt install pkg-config libglvnd-dev dkms build-essential libegl-dev libegl1 libgl-dev libgl1 libgles-dev libgles1 libglvnd-core-dev libglx-dev libopengl-dev gcc makesudo add-apt-repository ppa:graphics-drivers/ppa && sudo apt updateInstall drivers. Change the driver version based on your spec, I'm installing nvidia-driver-575.
sudo apt install nvidia-driver-575Reboot your system.
sudo rebootCheck if installation was successful by running the following command
nvidia-smiIt should produce an output like this:
rutu_sh@worker-1:~$ nvidia-smi
Sun Aug  3 17:23:37 2025
+-----------------------------------------------------------------------------------------+
| NVIDIA-SMI 575.64.03              Driver Version: 575.64.03      CUDA Version: 12.9     |
|-----------------------------------------+------------------------+----------------------+
| GPU  Name                 Persistence-M | Bus-Id          Disp.A | Volatile Uncorr. ECC |
| Fan  Temp   Perf          Pwr:Usage/Cap |           Memory-Usage | GPU-Util  Compute M. |
|                                         |                        |               MIG M. |
|=========================================+========================+======================|
|   0  Tesla P100-PCIE-12GB           Off |   00000000:86:00.0 Off |                    0 |
| N/A   27C    P0             24W /  250W |       0MiB /  12288MiB |      0%      Default |
|                                         |                        |                  N/A |
+-----------------------------------------+------------------------+----------------------+

+-----------------------------------------------------------------------------------------+
| Processes:                                                                              |
|  GPU   GI   CI              PID   Type   Process name                        GPU Memory |
|        ID   ID                                                               Usage      |
|=========================================================================================|
|  No running processes found                                                             |
+-----------------------------------------------------------------------------------------+
Now you have successfully installed Nvidia drivers. Now its time to install containerd.
Installing Containerd
Containerd for Ubuntu is managed by Docker, so we'll refer to their website to install containerd on the system.
for pkg in docker.io docker-doc docker-compose docker-compose-v2 podman-docker containerd runc; do sudo apt-get remove $pkg; done# Add Docker's official GPG key:
sudo apt-get update
sudo apt-get install ca-certificates curl
sudo install -m 0755 -d /etc/apt/keyrings
sudo curl -fsSL https://download.docker.com/linux/ubuntu/gpg -o /etc/apt/keyrings/docker.asc
sudo chmod a+r /etc/apt/keyrings/docker.asc
# Add the repository to Apt sources:
echo \
"deb [arch=$(dpkg --print-architecture) signed-by=/etc/apt/keyrings/docker.asc] https://download.docker.com/linux/ubuntu \
$(. /etc/os-release && echo "${UBUNTU_CODENAME:-$VERSION_CODENAME}") stable" | \
sudo tee /etc/apt/sources.list.d/docker.list > /dev/null
sudo apt-get updatesudo apt-get install -y docker-ce docker-ce-cli containerd.io docker-buildx-plugin docker-compose-pluginTo use docker without sudo, run this and login again so that your credentials are re-evaluated.
sudo usermod -aG docker $USERInstalling Nvidia container runtime (on worker nodes)
The nvidia-container-runtime is a OCI-compatible GPU container runtime that allows you to allocate GPU resources to containers. Install it only on nodes that have GPUs and nvidia-drivers installed. This part is referenced from here.
curl -fsSL https://nvidia.github.io/libnvidia-container/gpgkey | sudo gpg --dearmor -o /usr/share/keyrings/nvidia-container-toolkit-keyring.gpg \
  && curl -s -L https://nvidia.github.io/libnvidia-container/stable/deb/nvidia-container-toolkit.list | \
    sed 's#deb https://#deb [signed-by=/usr/share/keyrings/nvidia-container-toolkit-keyring.gpg] https://#g' | \
sudo tee /etc/apt/sources.list.d/nvidia-container-toolkit.listsudo apt-get updateexport NVIDIA_CONTAINER_TOOLKIT_VERSION=1.17.8-1
sudo apt-get install -y \
nvidia-container-toolkit=${NVIDIA_CONTAINER_TOOLKIT_VERSION} \
nvidia-container-toolkit-base=${NVIDIA_CONTAINER_TOOLKIT_VERSION} \
libnvidia-container-tools=${NVIDIA_CONTAINER_TOOLKIT_VERSION} \
libnvidia-container1=${NVIDIA_CONTAINER_TOOLKIT_VERSION}Configuring Containerd
To get the Nvidia runtime working with Kubelet, it must be the default runtime.
Now this may cause problem for other control plane components, so we recommend to have runc as the default runtime for control plane nodes or nodes without GPUs.
For data plane nodes with GPU, we use the nvidia-container-runtime as default.
Based on the type of node, pick the containerd config.
disabled_plugins = []
imports = []
oom_score = 0
plugin_dir = ""
required_plugins = []
root = "/var/lib/containerd"
state = "/run/containerd"
temp = ""
version = 2

[cgroup]
  path = ""

[debug]
  address = ""
  format = ""
  gid = 0
  level = ""
  uid = 0

[grpc]
  address = "/run/containerd/containerd.sock"
  gid = 0
  max_recv_message_size = 16777216
  max_send_message_size = 16777216
  tcp_address = ""
  tcp_tls_ca = ""
  tcp_tls_cert = ""
  tcp_tls_key = ""
  uid = 0

[metrics]
  address = ""
  grpc_histogram = false

[plugins]

  [plugins."io.containerd.gc.v1.scheduler"]
    deletion_threshold = 0
    mutation_threshold = 100
    pause_threshold = 0.02
    schedule_delay = "0s"
    startup_delay = "100ms"

  [plugins."io.containerd.grpc.v1.cri"]
    cdi_spec_dirs = ["/etc/cdi", "/var/run/cdi"]
    device_ownership_from_security_context = false
    disable_apparmor = false
    disable_cgroup = false
    disable_hugetlb_controller = true
    disable_proc_mount = false
    disable_tcp_service = true
    drain_exec_sync_io_timeout = "0s"
    enable_cdi = false
    enable_selinux = false
    enable_tls_streaming = false
    enable_unprivileged_icmp = false
    enable_unprivileged_ports = false
    ignore_deprecation_warnings = []
    ignore_image_defined_volumes = false
    image_pull_progress_timeout = "5m0s"
    image_pull_with_sync_fs = false
    max_concurrent_downloads = 3
    max_container_log_line_size = 16384
    netns_mounts_under_state_dir = false
    restrict_oom_score_adj = false
    sandbox_image = "registry.k8s.io/pause:3.10"
    selinux_category_range = 1024
    stats_collect_period = 10
    stream_idle_timeout = "4h0m0s"
    stream_server_address = "127.0.0.1"
    stream_server_port = "0"
    systemd_cgroup = false
    tolerate_missing_hugetlb_controller = true
    unset_seccomp_profile = ""

    [plugins."io.containerd.grpc.v1.cri".cni]
      bin_dir = "/opt/cni/bin"
      conf_dir = "/etc/cni/net.d"
      conf_template = ""
      ip_pref = ""
      max_conf_num = 1
      setup_serially = false

    [plugins."io.containerd.grpc.v1.cri".containerd]
      default_runtime_name = "nvidia"
      disable_snapshot_annotations = true
      discard_unpacked_layers = false
      ignore_blockio_not_enabled_errors = false
      ignore_rdt_not_enabled_errors = false
      no_pivot = false
      snapshotter = "overlayfs"

      [plugins."io.containerd.grpc.v1.cri".containerd.default_runtime]
        base_runtime_spec = ""
        cni_conf_dir = ""
        cni_max_conf_num = 0
        container_annotations = []
        pod_annotations = []
        privileged_without_host_devices = false
        privileged_without_host_devices_all_devices_allowed = false
        runtime_engine = ""
        runtime_path = ""
        runtime_root = ""
        runtime_type = ""
        sandbox_mode = ""
        snapshotter = ""

        [plugins."io.containerd.grpc.v1.cri".containerd.default_runtime.options]

      [plugins."io.containerd.grpc.v1.cri".containerd.runtimes]

        [plugins."io.containerd.grpc.v1.cri".containerd.runtimes.runc]
          base_runtime_spec = ""
          cni_conf_dir = ""
          cni_max_conf_num = 0
          container_annotations = []
          pod_annotations = []
          privileged_without_host_devices = false
          privileged_without_host_devices_all_devices_allowed = false
          runtime_engine = ""
          runtime_path = ""
          runtime_root = ""
          runtime_type = "io.containerd.runc.v2"
          sandbox_mode = "podsandbox"
          snapshotter = ""

          [plugins."io.containerd.grpc.v1.cri".containerd.runtimes.runc.options]
            BinaryName = ""
            CriuImagePath = ""
            CriuPath = ""
            CriuWorkPath = ""
            IoGid = 0
            IoUid = 0
            NoNewKeyring = false
            NoPivotRoot = false
            Root = ""
            ShimCgroup = ""
            SystemdCgroup = true

          [plugins."io.containerd.grpc.v1.cri".containerd.runtimes.nvidia]
	          runtime_type = "io.containerd.runc.v2"
            [plugins."io.containerd.grpc.v1.cri".containerd.runtimes.nvidia.options]
              BinaryName = "nvidia-container-runtime"
              CriuImagePath = ""
	            CriuPath = ""
	            CriuWorkPath = ""
	            IoGid = 0
	            IoUid = 0
	            NoNewKeyring = false
	            NoPivotRoot = false
	            Root = ""
	            ShimCgroup = ""
	            SystemdCgroup = true

      [plugins."io.containerd.grpc.v1.cri".containerd.untrusted_workload_runtime]
        base_runtime_spec = ""
        cni_conf_dir = ""
        cni_max_conf_num = 0
        container_annotations = []
        pod_annotations = []
        privileged_without_host_devices = false
        privileged_without_host_devices_all_devices_allowed = false
        runtime_engine = ""
        runtime_path = ""
        runtime_root = ""
        runtime_type = ""
        sandbox_mode = ""
        snapshotter = ""

        [plugins."io.containerd.grpc.v1.cri".containerd.untrusted_workload_runtime.options]

    [plugins."io.containerd.grpc.v1.cri".image_decryption]
      key_model = "node"

    [plugins."io.containerd.grpc.v1.cri".registry]
      config_path = ""

      [plugins."io.containerd.grpc.v1.cri".registry.auths]

      [plugins."io.containerd.grpc.v1.cri".registry.configs]

      [plugins."io.containerd.grpc.v1.cri".registry.headers]

      [plugins."io.containerd.grpc.v1.cri".registry.mirrors]

    [plugins."io.containerd.grpc.v1.cri".x509_key_pair_streaming]
      tls_cert_file = ""
      tls_key_file = ""

  [plugins."io.containerd.internal.v1.opt"]
    path = "/opt/containerd"

  [plugins."io.containerd.internal.v1.restart"]
    interval = "10s"

  [plugins."io.containerd.internal.v1.tracing"]

  [plugins."io.containerd.metadata.v1.bolt"]
    content_sharing_policy = "shared"

  [plugins."io.containerd.monitor.v1.cgroups"]
    no_prometheus = false

  [plugins."io.containerd.nri.v1.nri"]
    disable = true
    disable_connections = false
    plugin_config_path = "/etc/nri/conf.d"
    plugin_path = "/opt/nri/plugins"
    plugin_registration_timeout = "5s"
    plugin_request_timeout = "2s"
    socket_path = "/var/run/nri/nri.sock"

  [plugins."io.containerd.runtime.v1.linux"]
    no_shim = false
    runtime = "runc"
    runtime_root = ""
    shim = "containerd-shim"
    shim_debug = false

  [plugins."io.containerd.runtime.v2.task"]
    platforms = ["linux/amd64"]
    sched_core = false

  [plugins."io.containerd.service.v1.diff-service"]
    default = ["walking"]
    sync_fs = false

  [plugins."io.containerd.service.v1.tasks-service"]
    blockio_config_file = ""
    rdt_config_file = ""

  [plugins."io.containerd.snapshotter.v1.aufs"]
    root_path = ""

  [plugins."io.containerd.snapshotter.v1.blockfile"]
    fs_type = ""
    mount_options = []
    root_path = ""
    scratch_file = ""

  [plugins."io.containerd.snapshotter.v1.btrfs"]
    root_path = ""

  [plugins."io.containerd.snapshotter.v1.devmapper"]
    async_remove = false
    base_image_size = ""
    discard_blocks = false
    fs_options = ""
    fs_type = ""
    pool_name = ""
    root_path = ""

  [plugins."io.containerd.snapshotter.v1.native"]
    root_path = ""

  [plugins."io.containerd.snapshotter.v1.overlayfs"]
    mount_options = []
    root_path = ""
    sync_remove = false
    upperdir_label = false

  [plugins."io.containerd.snapshotter.v1.zfs"]
    root_path = ""

  [plugins."io.containerd.tracing.processor.v1.otlp"]

  [plugins."io.containerd.transfer.v1.local"]
    config_path = ""
    max_concurrent_downloads = 3
    max_concurrent_uploaded_layers = 3

    [[plugins."io.containerd.transfer.v1.local".unpack_config]]
      differ = ""
      platform = "linux/amd64"
      snapshotter = "overlayfs"

[proxy_plugins]

[stream_processors]

  [stream_processors."io.containerd.ocicrypt.decoder.v1.tar"]
    accepts = ["application/vnd.oci.image.layer.v1.tar+encrypted"]
    args = ["--decryption-keys-path", "/etc/containerd/ocicrypt/keys"]
    env = ["OCICRYPT_KEYPROVIDER_CONFIG=/etc/containerd/ocicrypt/ocicrypt_keyprovider.conf"]
    path = "ctd-decoder"
    returns = "application/vnd.oci.image.layer.v1.tar"

  [stream_processors."io.containerd.ocicrypt.decoder.v1.tar.gzip"]
    accepts = ["application/vnd.oci.image.layer.v1.tar+gzip+encrypted"]
    args = ["--decryption-keys-path", "/etc/containerd/ocicrypt/keys"]
    env = ["OCICRYPT_KEYPROVIDER_CONFIG=/etc/containerd/ocicrypt/ocicrypt_keyprovider.conf"]
    path = "ctd-decoder"
    returns = "application/vnd.oci.image.layer.v1.tar+gzip"

[timeouts]
  "io.containerd.timeout.bolt.open" = "0s"
  "io.containerd.timeout.metrics.shimstats" = "2s"
  "io.containerd.timeout.shim.cleanup" = "5s"
  "io.containerd.timeout.shim.load" = "5s"
  "io.containerd.timeout.shim.shutdown" = "3s"
  "io.containerd.timeout.task.state" = "2s"

[ttrpc]
  address = ""
  gid = 0
uid = 0disabled_plugins = []
imports = []
oom_score = 0
plugin_dir = ""
required_plugins = []
root = "/var/lib/containerd"
state = "/run/containerd"
temp = ""
version = 2
[cgroup]
path = ""
[debug]
address = ""
format = ""
gid = 0
level = ""
uid = 0
[grpc]
address = "/run/containerd/containerd.sock"
gid = 0
max_recv_message_size = 16777216
max_send_message_size = 16777216
tcp_address = ""
tcp_tls_ca = ""
tcp_tls_cert = ""
tcp_tls_key = ""
uid = 0
[metrics]
address = ""
grpc_histogram = false
[plugins]
[plugins."io.containerd.gc.v1.scheduler"]
deletion_threshold = 0
mutation_threshold = 100
pause_threshold = 0.02
schedule_delay = "0s"
startup_delay = "100ms"
[plugins."io.containerd.grpc.v1.cri"]
cdi_spec_dirs = ["/etc/cdi", "/var/run/cdi"]
device_ownership_from_security_context = false
disable_apparmor = false
disable_cgroup = false
disable_hugetlb_controller = true
disable_proc_mount = false
disable_tcp_service = true
drain_exec_sync_io_timeout = "0s"
enable_cdi = false
enable_selinux = false
enable_tls_streaming = false
enable_unprivileged_icmp = false
enable_unprivileged_ports = false
ignore_deprecation_warnings = []
ignore_image_defined_volumes = false
image_pull_progress_timeout = "5m0s"
image_pull_with_sync_fs = false
max_concurrent_downloads = 3
max_container_log_line_size = 16384
netns_mounts_under_state_dir = false
restrict_oom_score_adj = false
sandbox_image = "registry.k8s.io/pause:3.10"
selinux_category_range = 1024
stats_collect_period = 10
stream_idle_timeout = "4h0m0s"
stream_server_address = "127.0.0.1"
stream_server_port = "0"
systemd_cgroup = false
tolerate_missing_hugetlb_controller = true
unset_seccomp_profile = ""
[plugins."io.containerd.grpc.v1.cri".cni]
bin_dir = "/opt/cni/bin"
conf_dir = "/etc/cni/net.d"
conf_template = ""
ip_pref = ""
max_conf_num = 1
setup_serially = false
[plugins."io.containerd.grpc.v1.cri".containerd]
default_runtime_name = "runc"
disable_snapshot_annotations = true
discard_unpacked_layers = false
ignore_blockio_not_enabled_errors = false
ignore_rdt_not_enabled_errors = false
no_pivot = false
snapshotter = "overlayfs"
[plugins."io.containerd.grpc.v1.cri".containerd.default_runtime]
base_runtime_spec = ""
cni_conf_dir = ""
cni_max_conf_num = 0
container_annotations = []
pod_annotations = []
privileged_without_host_devices = false
privileged_without_host_devices_all_devices_allowed = false
runtime_engine = ""
runtime_path = ""
runtime_root = ""
runtime_type = ""
sandbox_mode = ""
snapshotter = ""
[plugins."io.containerd.grpc.v1.cri".containerd.default_runtime.options]
[plugins."io.containerd.grpc.v1.cri".containerd.runtimes]
[plugins."io.containerd.grpc.v1.cri".containerd.runtimes.runc]
base_runtime_spec = ""
cni_conf_dir = ""
cni_max_conf_num = 0
container_annotations = []
pod_annotations = []
privileged_without_host_devices = false
privileged_without_host_devices_all_devices_allowed = false
runtime_engine = ""
runtime_path = ""
runtime_root = ""
runtime_type = "io.containerd.runc.v2"
sandbox_mode = "podsandbox"
snapshotter = ""
[plugins."io.containerd.grpc.v1.cri".containerd.runtimes.runc.options]
BinaryName = ""
CriuImagePath = ""
CriuPath = ""
CriuWorkPath = ""
IoGid = 0
IoUid = 0
NoNewKeyring = false
NoPivotRoot = false
Root = ""
ShimCgroup = ""
SystemdCgroup = true
[plugins."io.containerd.grpc.v1.cri".containerd.untrusted_workload_runtime]
base_runtime_spec = ""
cni_conf_dir = ""
cni_max_conf_num = 0
container_annotations = []
pod_annotations = []
privileged_without_host_devices = false
privileged_without_host_devices_all_devices_allowed = false
runtime_engine = ""
runtime_path = ""
runtime_root = ""
runtime_type = ""
sandbox_mode = ""
snapshotter = ""
[plugins."io.containerd.grpc.v1.cri".containerd.untrusted_workload_runtime.options]
[plugins."io.containerd.grpc.v1.cri".image_decryption]
key_model = "node"
[plugins."io.containerd.grpc.v1.cri".registry]
config_path = ""
[plugins."io.containerd.grpc.v1.cri".registry.auths]
[plugins."io.containerd.grpc.v1.cri".registry.configs]
[plugins."io.containerd.grpc.v1.cri".registry.headers]
[plugins."io.containerd.grpc.v1.cri".registry.mirrors]
[plugins."io.containerd.grpc.v1.cri".x509_key_pair_streaming]
tls_cert_file = ""
tls_key_file = ""
[plugins."io.containerd.internal.v1.opt"]
path = "/opt/containerd"
[plugins."io.containerd.internal.v1.restart"]
interval = "10s"
[plugins."io.containerd.internal.v1.tracing"]
[plugins."io.containerd.metadata.v1.bolt"]
content_sharing_policy = "shared"
[plugins."io.containerd.monitor.v1.cgroups"]
no_prometheus = false
[plugins."io.containerd.nri.v1.nri"]
disable = true
disable_connections = false
plugin_config_path = "/etc/nri/conf.d"
plugin_path = "/opt/nri/plugins"
plugin_registration_timeout = "5s"
plugin_request_timeout = "2s"
socket_path = "/var/run/nri/nri.sock"
[plugins."io.containerd.runtime.v1.linux"]
no_shim = false
runtime = "runc"
runtime_root = ""
shim = "containerd-shim"
shim_debug = false
[plugins."io.containerd.runtime.v2.task"]
platforms = ["linux/amd64"]
sched_core = false
[plugins."io.containerd.service.v1.diff-service"]
default = ["walking"]
sync_fs = false
[plugins."io.containerd.service.v1.tasks-service"]
blockio_config_file = ""
rdt_config_file = ""
[plugins."io.containerd.snapshotter.v1.aufs"]
root_path = ""
[plugins."io.containerd.snapshotter.v1.blockfile"]
fs_type = ""
mount_options = []
root_path = ""
scratch_file = ""
[plugins."io.containerd.snapshotter.v1.btrfs"]
root_path = ""
[plugins."io.containerd.snapshotter.v1.devmapper"]
async_remove = false
base_image_size = ""
discard_blocks = false
fs_options = ""
fs_type = ""
pool_name = ""
root_path = ""
[plugins."io.containerd.snapshotter.v1.native"]
root_path = ""
[plugins."io.containerd.snapshotter.v1.overlayfs"]
mount_options = []
root_path = ""
sync_remove = false
upperdir_label = false
[plugins."io.containerd.snapshotter.v1.zfs"]
root_path = ""
[plugins."io.containerd.tracing.processor.v1.otlp"]
[plugins."io.containerd.transfer.v1.local"]
config_path = ""
max_concurrent_downloads = 3
max_concurrent_uploaded_layers = 3
[[plugins."io.containerd.transfer.v1.local".unpack_config]]
differ = ""
platform = "linux/amd64"
snapshotter = "overlayfs"
[proxy_plugins]
[stream_processors]
[stream_processors."io.containerd.ocicrypt.decoder.v1.tar"]
accepts = ["application/vnd.oci.image.layer.v1.tar+encrypted"]
args = ["--decryption-keys-path", "/etc/containerd/ocicrypt/keys"]
env = ["OCICRYPT_KEYPROVIDER_CONFIG=/etc/containerd/ocicrypt/ocicrypt_keyprovider.conf"]
path = "ctd-decoder"
returns = "application/vnd.oci.image.layer.v1.tar"
[stream_processors."io.containerd.ocicrypt.decoder.v1.tar.gzip"]
accepts = ["application/vnd.oci.image.layer.v1.tar+gzip+encrypted"]
args = ["--decryption-keys-path", "/etc/containerd/ocicrypt/keys"]
env = ["OCICRYPT_KEYPROVIDER_CONFIG=/etc/containerd/ocicrypt/ocicrypt_keyprovider.conf"]
path = "ctd-decoder"
returns = "application/vnd.oci.image.layer.v1.tar+gzip"
[timeouts]
"io.containerd.timeout.bolt.open" = "0s"
"io.containerd.timeout.metrics.shimstats" = "2s"
"io.containerd.timeout.shim.cleanup" = "5s"
"io.containerd.timeout.shim.load" = "5s"
"io.containerd.timeout.shim.shutdown" = "3s"
"io.containerd.timeout.task.state" = "2s"
[ttrpc]
address = ""
gid = 0
uid = 0
Overwrite the file /etc/containerd/config.toml with the config you copied from above.
Restart containerd
sudo systemctl restart containerdVerify the status of containerd service using
sudo systemctl status containerdSetting up requirements for Cilium
We're going to use Cilium to manage networking for our pods.
Its an awesome tool that uses eBPF.
Install Cilium CLI
CILIUM_CLI_VERSION=$(curl -s https://raw.githubusercontent.com/cilium/cilium-cli/main/stable.txt)
CLI_ARCH=amd64
if [ "$(uname -m)" = "aarch64" ]; then CLI_ARCH=arm64; fi
curl -L --fail --remote-name-all https://github.com/cilium/cilium-cli/releases/download/${CILIUM_CLI_VERSION}/cilium-linux-${CLI_ARCH}.tar.gz{,.sha256sum}
sha256sum --check cilium-linux-${CLI_ARCH}.tar.gz.sha256sum
sudo tar xzvfC cilium-linux-${CLI_ARCH}.tar.gz /usr/local/bin
rm cilium-linux-${CLI_ARCH}.tar.gz{,.sha256sum}
Install Helm
curl https://baltocdn.com/helm/signing.asc | gpg --dearmor | sudo tee /usr/share/keyrings/helm.gpg > /dev/null
sudo apt-get install apt-transport-https --yes
echo "deb [arch=$(dpkg --print-architecture) signed-by=/usr/share/keyrings/helm.gpg] https://baltocdn.com/helm/stable/debian/ all main" | sudo tee /etc/apt/sources.list.d/helm-stable-debian.list
sudo apt-get update
sudo apt-get install helm
Add Cilium Helm repo
helm repo add cilium https://helm.cilium.io/Configuring Kubernetes
Now lets configure the setup for Kubernetes on all our nodes.
Disable swap
sudo swapoff -a && sudo sed -i '/ swap / s/^/#/' /etc/fstabInstall kubeadm, kubectl, kubelet
sudo apt-get install -y apt-transport-https ca-certificates curl gpgcurl -fsSL https://pkgs.k8s.io/core:/stable:/v1.33/deb/Release.key | sudo gpg --dearmor -o /etc/apt/keyrings/kubernetes-apt-keyring.gpgecho 'deb [signed-by=/etc/apt/keyrings/kubernetes-apt-keyring.gpg] https://pkgs.k8s.io/core:/stable:/v1.33/deb/ /' | sudo tee /etc/apt/sources.list.d/kubernetes.list sudo apt-get update && sudo apt-get install -y kubelet kubeadm kubectlEnable Kubelet service
sudo systemctl enable --now kubeletMaster node setup
Now we'll configure the master node and initialize the cluster. Run this only on the master node.
Initialize the cluster with kubeadm init.
Note that the --apiserver-advertise-address advertises the local IP of the master node.
Configure it according to your setup.
Also set the {public_ip} if you want the Kube API Server to be publicly reachable.
Ideally we'd use Cilium's kubeproxy replacement to instantiate our cluster.
However, Cilium recommends not using it for Istio integration (we'll need istio later to setup kubeflow), we'll skip it.
If you don't plan on using Istio, and want to use Cilium's service mesh instead, you can disable Kubeproxy.
sudo kubeadm init \
	--cri-socket=unix:///run/containerd/containerd.sock \
	--pod-network-cidr=192.168.0.0/16 \
	--node-name=master \
	--apiserver-advertise-address=192.168.1.1 \
	--apiserver-cert-extra-sans={public_ip}
Copy Kubeconfig to .kube/config on your master node. You can copy this config to your local as well if you advertised the kube api server on a public ip.
mkdir -p $HOME/.kube
sudo cp -i /etc/kubernetes/admin.conf $HOME/.kube/config
sudo chown $(id -u):$(id -g) $HOME/.kube/config
Once the master node is initialized, setup Cilium. Modify the --set k8sServiceHost parameter according to your setup.
helm install cilium cilium/cilium --version 1.18.0 \
        --namespace kube-system \
        --set socketLB.hostNamespaceOnly=true \
        --set cni.exclusive=false
To discover GPU resources on the Node, the k8s-device-plugin for nvidia must be installed. This creates a daemonset, which runs a pod on each node that is responsible for discovering the GPU resources.
kubectl create -f https://raw.githubusercontent.com/NVIDIA/k8s-device-plugin/v0.17.1/deployments/static/nvidia-device-plugin.ymlGet the kubeadm join command from the master node.
sudo kubeadm token create --print-join-commandCopy this command and paste it down somewhere.
Worker node setup
Now we just have to let the worker node join the Kubernetes cluster.
Run this on worker1 node
sudo {insert join-command} \
    --cri-socket=unix:///run/containerd/containerd.sock \
    --node-name=worker1
And for worker2
sudo {insert join-command} \
    --cri-socket=unix:///run/containerd/containerd.sock \
    --node-name=worker2
Verify setup
Wait for the daemonset pods to be created in each of the nodes (except control plane nodes). Check status with following:
kubectl get po -n kube-system -l name=nvidia-device-plugin-ds On each of the nodes running daemonset pods, restart Kubelet. Now the GPU resources will be discoverable.
sudo systemctl restart kubelet Check if GPU resources are available now.
kubectl describe node worker1 | grep -B 6 -i gpu
The GPU resource should be available as nvidia.com/gpu.
Save the following as pod.yaml (ref: nvidia/k8s-device-plugin)
apiVersion: v1
kind: Pod
metadata:
  name: gpu-pod
spec:
  restartPolicy: Never
  containers:
    - name: cuda-container
      image: nvcr.io/nvidia/k8s/cuda-sample:vectoradd-cuda12.5.0
      resources:
        limits:
          nvidia.com/gpu: 1 # requesting 1 GPU
  tolerations:
  - key: nvidia.com/gpu
    operator: Exists
    effect: NoSchedule
Apply the manifest:
kubectl apply -f pod.yamlView pod logs to verify
kubectl logs gpu-pod
Expected output
[Vector addition of 50000 elements]
Copy input data from the host memory to the CUDA device
CUDA kernel launch with 196 blocks of 256 threads
Copy output data from the CUDA device to the host memory
Test PASSED
Done
Conclusion
This article is completely handcrafted, and the above commands are from days of painstaiking debugging and restarting.
I have lost count of the number of times I had to restart the whole setup and initialize the cluster.
At this point I can setup Kubernetes on anything 😆.
In future articles I will cover the bugs I encountered and solved.
This would not have been possible without cloudlab.